
Sunday, 29 May 2011
Handbag cake with an ipod
This weekend I went on another of the wonderful Julia Francis' cake courses. We made a cake in the shape of a handbag. Next time, I'll be making an Anya Hindmarch or Louis Vuitton...


Monday, 16 May 2011
Monkeying around
My darling husband wanted all his favourite things in his birthday cake, so I made up a chocolate and banana cake recipe especially for him.


Polka dot and stripes
I wanted to share this monster of cake with you, made for a friend's birthday party!


Sunday, 10 April 2011


Sunday, 3 April 2011
Birthday cake double bill
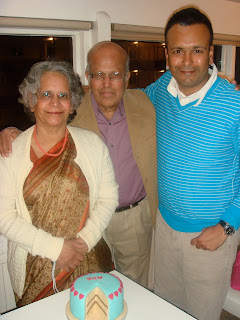
This may well get me into trouble with my mother-in-law...I had told her the missing slice from her cake was a special design feature. Little did she realise the missing slice was used for the benefit of another birthday cake! (Sorry Snigdha if you are reading this!)



Saturday, 19 March 2011
Cupcakes!
Another amazing Julia Francis cake class at Hammersmith and Fulham College...this time decorating cupcakes.

We learnt buttercream swirls and how to create sparkly stencil patterns.

We learnt buttercream swirls and how to create sparkly stencil patterns.
Hen do cake with pink L plates and a white stiletto
My first request for a hen do cake - a luscious chocolate cake with raspberry jam and butter cream, topped with a white stiletto!


Saturday, 26 February 2011
Tennis-tastic cakes
Here are some of my latest cakes - this time with a tennis theme.

This is my first attempt at making run outs ie piping royal icing into shapes, in this case some old-fashioned looking tennis rackets.


This is my first attempt at making run outs ie piping royal icing into shapes, in this case some old-fashioned looking tennis rackets.


Monday, 7 February 2011
How to do brush embroidery
To decorate a cake using brush embroidery, you will need:
· Miniature cakes covered in sugarpaste
· Small quantity of royal icing
· Small bowl
· Clean, damp cloth
· Small palette knife
· Piping bag
· No 4 nozzle
· Small brush
· Water
1. Give the royal icing a good mix and make sure it’s really smooth, especially if you made it a few days before

2. Fill your piping bag with the royal icing, keeping any spare in an airtight container or if it's in a bowl, covering with a clean, damp cloth to prevent it from crusting over

3. Pipe your chosen design onto the cake - using a thickish line

4. While the icing is still damp, using a small damp brush, draw the icing into the centre of the shape to create a 3D “embroidery” effect

Tips:
· Make sure your brush isn’t too wet and make sure to pipe a thick enough line, as the centre of the shape / flower should be covered with icing
Tuesday, 1 February 2011
What a peach
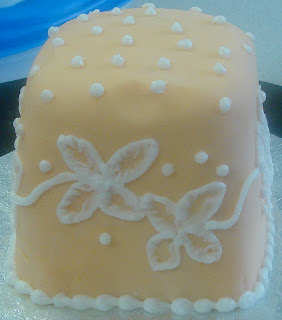
I'm having a very orange-infused week, inspired by all the bright tangerine shades going down the catwalk. This cake, with my first attempt at a technique called "brush embroidery", is a very subtle peach, but bright and colourful is never far away chez les Warty...

Subscribe to:
Posts (Atom)